Saturday, December 30, 2006

Bags!

Shhhhhh....

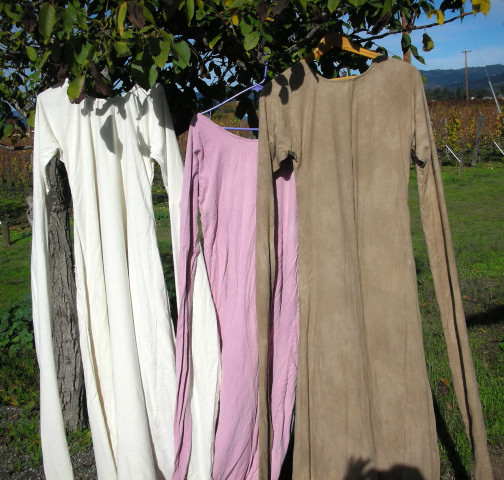
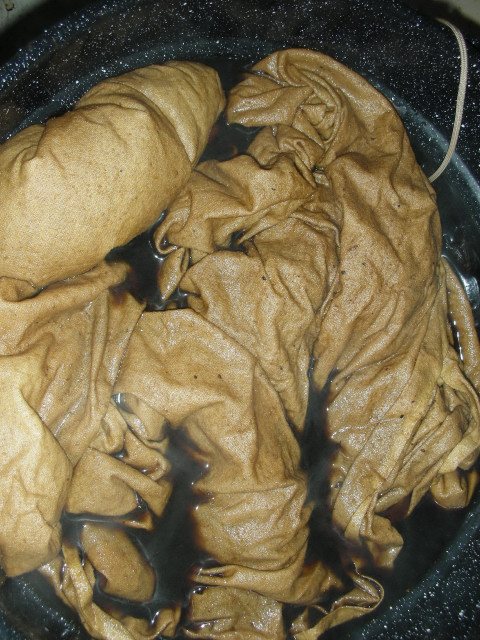
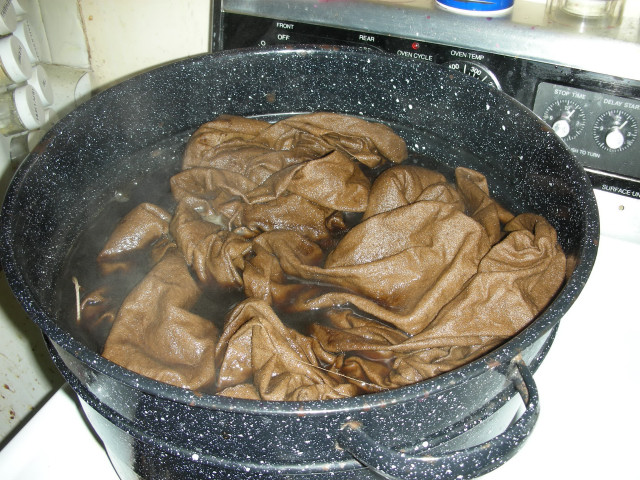
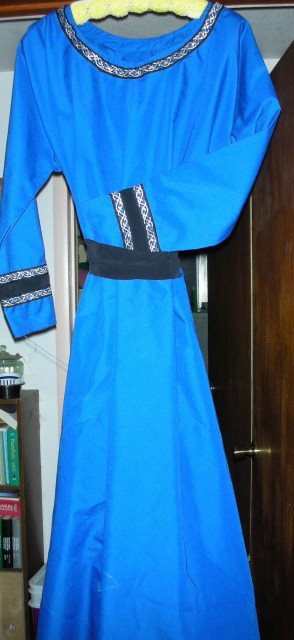
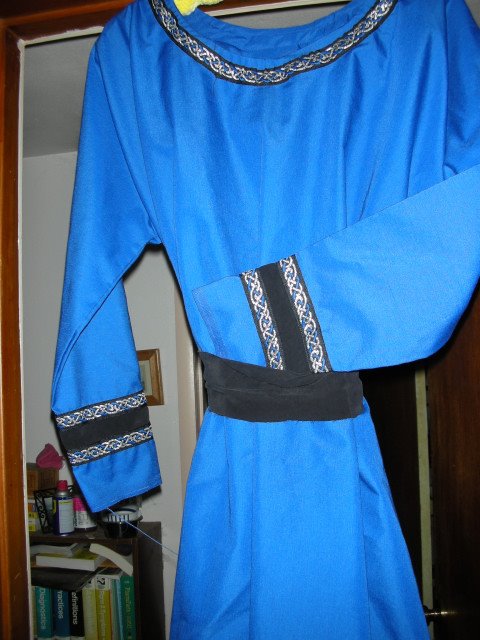
I don't think he looks and it is almost done. I am doing a bag for a friend. Today, I incised the leather and stained it a bit. I ran out of brown dye as my dye had tipped over in the storage container. I am glad I am using plastic storage containers now.

The first thing I did was make the basics of the pouch. I could get pretty far without carving the image. I created a simple pattern and cut the pieces out. I found there were a few ways people were doing these but I haven't found any local museums that might have something I need in their catalog. I am going to see if I can do that later on today.

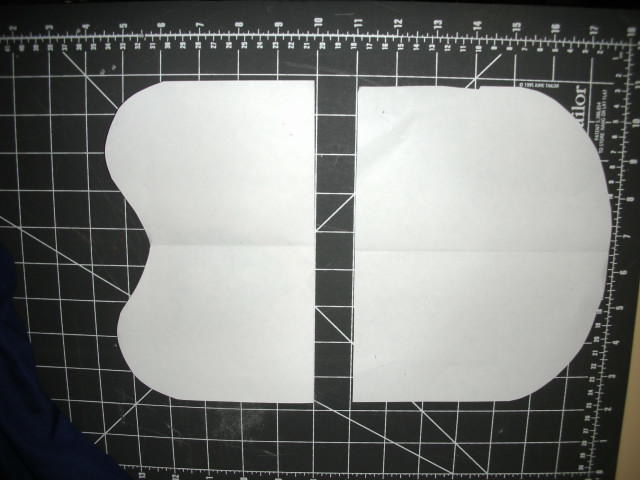
like the one I made for Beccabutt's Heraldry Flash Card Set. IThe pattern is simple. It is a kidney bag, much created a prototype of the pouch so she could work with her flash cards and carry them around with her. You might as well get *something* for learning to be a herald. Thank goodness I found someone to foist it off on. I am thrilled to go back to simple yelling and looking up names. Anyhow, I started with a basic kidney pattern. Notice the two pieces of paper? Ok, for the top of the pouch you put both together and cut that. For the bottom, just the rectangle. I also added about 2 inches between the two pattern pieces on this pouch because I plan on adding a strip of leather to make the pouch roomy.

The leather is a light, vegetable tanned hide. I got it from a local supplier and got a half way decent, cheap half. I think this is 8-9 ounce leather. I cut the pieces and even put the rivets in the back of the top layer. I used solid copper rivets because I know how to pound them over and they look spiffy to me. I am not fond of pop rivets because I made my own armor. Those rivets fall off all the time.


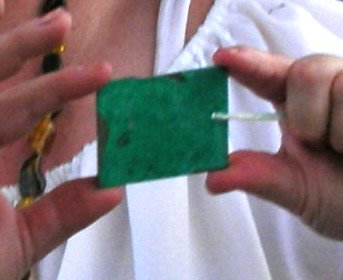
The next step is to make a cartoon. I am going to show you the steps with the West Kingdom Populace badge.

I blew the drawing up on my computer and printed it out. I took another piece of paper over the top, taped it to my window and then traced just the outline. Here is a version with the West Kingdom populace badge. You can see the tracing on the window. I don't have a light box. I have a great window with a kick butt view. Anyhow, I taped it up to the window and traced the outline.


Notice that I didn't do a lot of detail. Too much detail might have pulled away from my final image. I will be painting the image part after the pouch is dry. With more detailed drawings, I make the cartoon part a lot less detailed than the original drawing. All of my details and shading can be done with tools or paint.

So, here is the West Kingdom demi sun!


The next step is easy. You just get the leather damp. You want somewhere between damp and wet. I take a clean rag and dampen it with very warm water. I gently wring it so that it is not drippy. Then I brush the leather once, twice, three times. You will see three distinct color changes in the wet leather. I find that the third color change is perfect for my hand. Your mileage may differ. When the leather is wet, secure the cartoon onto the damp leather with tape or clamps. Then take a fine, blunt object and trace your design. I have a stylus now that I got for a dollar at a craft store. I have usually used ball point pens that have run out of ink. Don't use one with ink because sometimes you draw through the paper as it gets a little damp. Oh and use heavy paper to transfer the design. Good quality printer paper is perfect.


When your design is transfered on, remove the cartoon and look for touch up areas to clean it up for the next process. Notice the leather is still a bit wet? Once the transfer is complete, you can take a break. I wouldn't advise it if you haven't gotten the whole transfer done as things jostle. I hate tracing a design and having it off center a bit. Plus, you end up having to rewet things and start over. So, now is the time to take a break if you need one.


Once your cartoon is on the leather, you can gently carve it. I use an exacto knife. I prefer the heavier one. It doesn't skip around in my hand like a lighter one. You can also use a swivle knife that is made for leather or a razor blade or sharp knife. Just drag the blade with a light and level pressure. Do not cut through the leather. You are just scoring the surface. I went a tad too deep here.


Here is a shot of me tooling a bit of the design. I learned how to do this by using the end of a nail. Use the flat end to create a flat planer. I do both sides of each cut. You may need to rewet the leather to get it to bevel. That is what you are doing here, just beveling the carving.


It takes a bit to level each cut out. Don't worry if they are not pretty and perfect . I just start lightening the pressure.

Everything looks icky and dented in this picture, and it was. The good thing is that the tools smooth the skin gently as you go.


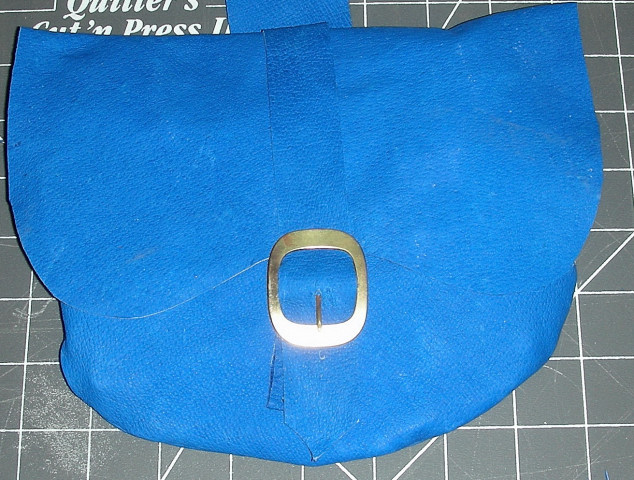
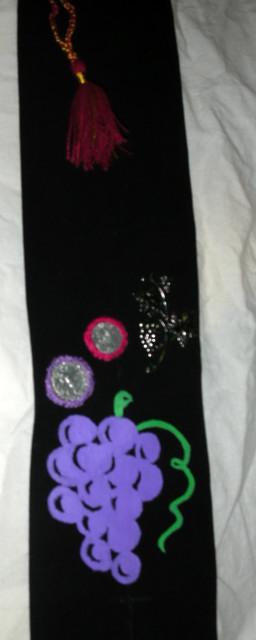
Below is the finished design for my new trifold pouch!


Thursday, December 28, 2006

Eeep


Sorry about the delay in posting. I will post the Christmas post for Susan later tonight. She needs to see the clean sewing area!


The collar is mostly done. The bag is mostly done. I had a personal issue that sucked up a huge amount of my time. There will be pictures over the next few days, including some of my bistre.

Tuesday, December 19, 2006

Avoiding!


I don't know what it is, but I have never been fond of doing split stitch. Plus, my embroidery is not nearly as good as it was in my 20s. I know more now, but my eyes are going and I can feel it. Hee. I am old and shall do leather work! Anyhow, this is the collar for the bliaut.

When I originally did the design, I really liked it. It was a combination of simple and flashy. I took it off of a couple of manuscripts. I did not like the way they combined and set it aside for a few days. Then I started working on the dots. They are two different sizes which is a little unusual and why I chose this design. If I were to do it again, I think I would a more eclesiastical look. I think this collar will stay on the dress for a while and then be retired to a t-tunic. This is another example of the process of making mistakes.


I am definitely more fond of it now. I am trying to keep in mind I have not embroidered for nearly 6 years. My stitch tension is good but my attention to detail is not, and I am going to need this when I work on this dress. I am going to finishe the collar, get another bit of that silk/linen blend for the collar and leave the sleeves plain for now. Let's see how I feel about it when it is done. I am feeling a strong tug to redo the piece in wool or a paisley leaf pattern I found in another drawing.

Saturday, December 16, 2006

FINI!!!


I did it! I finished the pouch.

I really like it. Really! It is fabulous. It isn't period and I am not going to pretend it is at the level I want things to be at. But, it is so cute! It turned out just like it was in my head. I also got to use some of the Norse dragon buttons I got several 12th Nights ago. I was in line waiting and a woman introduced herself. Her name was Diana Listmaker. What a silly name! She was very nice. This pouch was born with a story of how I met her.

Friday, December 15, 2006

Progress So Far


What do you think? Should the running stitch go on the straps too? I am inclined not to add running stitch in red on it. So far, I really like it.


Wednesday, December 13, 2006

Alms bag?

I started working on an alms bag. It definitely is smaller than what I wanted.

I needed a leather bag to carry my stuff in if I am not going to be wearing a belt. Alms bags seem to be the right thing. I thought about a cute little embroidered number. I am very hard on my clothes. I am as attentive to my clothing as an average 8 year old boy playing in a creek. What the heck. I have to stay busy and I need something that does look period.

I have decided what I really need is a good bag to wear all the time and a bigger and more organized bag for small crafts and things you always need at events. I also want to make a new feast bag. I liked my feast bag better than a basket because it was 100% washable and it was perfect to throw dirty dishes in.

Back to the alms bag. I wanted to use black leather and red linen. I have a cherry red linen that has a weight of 7.1 ounces per yard. I am going to be using that for a nice viking underdress. I thought the alms bag would be great as a later project. You know, after I made the dress. I couldn't wait. I cut off a fat quarter to work with. I have been studying lots of pictures and I was looking for a leather bag. I have zero documentation on this style in leather. There are serveral extant pieces that are silk or linen with embroidery in this general shape. This is a perioid piece as far as I know.

I drew out the design on some taped together pieces of printer paper. I drew a back with a lid and a front. This was a stupid mistake. In my first illustration, you can see that I cut the back and the front as two seperate pieces. When I looked again at the illustrations, I realized I would not get the crisp, perfectly pointed corners on the bag. The second illustration is how I should have cut the bag. It is the way I will do the next one.

I cut one piece out of red linen and one out of black garment leather. I then sewed up the linen as a lining and the leather as the outer. Then I ripped it out. What the heck. This was going to be flashy perioid piece and not something great because I already made it too small, out of leather and I messed up the design. I sewed each lining to each leather piece instead. I had an idea.

After sewing them, I pressed them and then sewed the bottoms together. The design may be wrong but it won't be horrible. Notice that the sides are not sewn together? That is because I am going to sew the sides together with red thread for a more striking effect.

It turned out just about the way I envisioned it so far. At this point I am pleased with the effect. The strap is externally attached with room for pilgrim's badges. I have stashed away a few so I am very excited about sewing them onto the bag.


This is what it looks like folded over? See that weird thing on the bag? It is a pewter wreath of roses. I think it used to be on a scented candle holder. The candle holder broke a few years ago and I haven't thrown away that pewter thing. It is one of those things you constantly find in your junk drawer and go 'wtf? What is that and why do I have it?' I stuck it on the bag because for some strange reason, that thing had migrated onto my desk. Obviously, that muse of freaky SCA projects is busy reorganizing my house.

Friday, November 24, 2006

I haven't been blogging

But, I have been working. I am sorting fabric and just did a bunch of heraldry stuff. I went to the meeting and I went to the collegium. I took Aurelia, my deputy with me. Two Aurelias! Ha! What is the world coming to? I have been knee deep in research and heraldry.


I have sewn up everything but the hems on the three dresses. Here are some pictures of them outside under the walnut tree. I really like the flow of the walnut dyed dress on the far right. On the far left is the plain, natural silk. The pattern is my own. I have included a rough bitmap but I don't think it is a very good drawing. It is a pretty basic tunic with gores.


I think many folks in SCA use a similar tunic design for the under dress. What is extant is mostly just little fragments of weave or trim. Trim helps keep fabric. People are apt to cut off the end of a sleeve and stick it in a trunk for later use. It has given me a few ideas on what is extant and what is not. We keep preaching this 'there is no extant 12th century garb' but there are a few rare pieces and loads of fragments. You can tell a lot from a fragment. One thing I have learned from patterning is that no two people do it exactly the same way. The big thing is achieving the look you want. If you have that planned out in advance, you won't have serious issues.

One thing we have not found with extant pieces is the curved armpit as in my pattern. Extant pieces tend to have diagonal gores or triangles in the armpit. That could easily be done on this cutting diagram by taking the triangular gore out of the corner between the sleeve extensions and the armpit. Squaring off the arm of the dress would be valuable too. Why didn't I do this? I like to take advantage of the bias of the fabric. That kind of stretchiness allows me to wear the same dress, fighting or not. My latissimus dorsi muscle tends to change shape when I am fighting. This has caused me problems in the past. I will make garb and it won't fit because of the muscle. That happened to me during my "Year of the Norse" clothing scare. 8 dresses, two of which still fit.

The sleeves are plenty long and it seems I can get on with lining the cloak and making the over dress. I have been very intersted in doing sleeve treatments from Chartres on my aqua silk, but I am not sure which ones to do. I had better get on it soon.

Saturday, November 11, 2006

accessories!

In my quest to be more period, I have been working on some accessories for my costumes. I picked up a bunch of garment leather to do details on various projects, but it was also cheaper than the half hide I bought. I can use the garment leather to make patterns, much like a dressmaker would use muslin. I know I need a tough, leather bag for my every day items. I plan on making an alms bag for money. What is the difference?

Wallets, pouches and purses were used for personal items. It all depends on the time period, where you are going and what your social class is, of course. I am a French Courtier or a nun, depending on how old I feel that day. I have finally decided. There are days when a Dominican Habit and the 13th century do not fit. It is then when you are a 12th century French Courtier. (Not courtesan. I am merely a minor hanger-0n in court.)

I found an interesting 12th century bag for sale that featured a kidney shaped flap. You can see them at http://www.by-the-sword.com/acatalog/images/gh0055.jpg or at http://www.jekylthehidesmith.com/12thCenturyWallets.htm for reference. The picture is lifted from jekylthehidsmith.com but I am giving them a plug. I found a couple of original examples that I am having a devil of a time finding again. It seems that in leather, the bag with the kidney shaped flap was the stylish thing to wear. Fancy alms bags were a must. I will need both. I am also an organization freak so I will be adding tiny wallets for things like money, contacts, medical info and my cell phone (which will be on vibrate at vents.)


I started by creating an outline. It seemed like the illumination pages and the extant pieces did not have a base like we find in a modern purse. These were wallety-pouches. They generally have a strap with a buckle closure or a beaded tie. Some were one points to attach to the belt and some were two. I really prefer the two as is shown in the jekyl piece, but most of the drawings I found were single straps. I wrote the purveyors to see if they had an idea of where they got the design.

My first try was going to be a single point with a simple buckle closure since I have a gazillion buckles left over from the boxes of buttons. I pulled out a brass one that I figured I could live without and that looks period. I took some polish to it and cleaned it up and wow, it looks great. Huzzah for recycling. I basically whipped it up to see how the thing would look if I were to make another. The blue on blue is tough to photograph.

What would I do differently? I would edge the flap. I would also line the final version. I think two points are necessary with this weight leather. I would do a final version of a more durable leather. I would also double over and edge stitch the straps. I also did a curved bottom which is kind of silly. I didn't see examples of that. I think outside stitching or a pounded folded edge seam would be more fun too. All in all, the pattern is only about 1/2 inch off. Of course, if I were smart I would just buy one.

Tuesday, November 07, 2006

Christmas...

I have a huge case of the I wants today.

Aureelia's Christmas List:

My own bottle capper.
Some wood.
A new shield (GREGGIE!)

Anything on this page:
http://www.revivalclothing.com/catpages/talbot/tal_buckles.htm


Books I need (or think I need.):

Blood Red Roses: The Archaeology of a mass grave from the Battle of Towton AD 1461 (Hardcover) by Anthea Boylston (Editor), Christopher Knusel (Editor), Veronica Fiorato


More to come...

Three Colors


Well, not as happy as I had hoped. You can see differences. I think we know now that I will never be a professional. THEY AREN'T SUPPOSED TO BE PALE! I am doing something wrong. I have to do more research. Oh, it looks so easy on paper, doesn't it?

Left to right: Walnut with Alum mordant on silk, plain raw silk, fermented cochineal on silk.

Still, they aren't suckage. The walnut is a pretty color. I do like it. It would look smashing under a green or gold wool dress. I have a lot of sewing to do and a lot of thinking over how to get all of this a great deal darker than it is.

Monday, November 06, 2006

kirtle


Dear God I am fat! Whoa, those things in the front are falling fast. Remind me to wear a bra. It never hits you until times like this, does it? I am getting broader by the year. Yeesh. Hey, but that can be fixed.

Let's look at the kirtle. It is 100% silk, dyed for 2 hours in fermented cochineal. The mordant was alum. This can go under a cote or a bliaut. The color does show up in a few illuminations, but I am going to check with Master James. I think they are faded.

The length is good and the arms rauched a lot. HUGE amounts. Maybe too much. I think it is just a tad too bulky. Here is an arm shot. All the seams are frenched and except for a tiny part under the armpits, they are perfect. The tightness around the arms is weird, but I think I can live with it.


Maybe I should trim them? What do you think?

The color in the top picture is more realistic to what the dress looks like. It is a sort of raspberry. This sleeve picture is over exposed and I lightened it so you can see how much is bunched up on my forearm.

Walnuts


I began the walnut dye a few days ago. I steeped the hulls three days, until it was a whimpy coffee color. I then strained the mixture and peeled off the hulls and boiled them for 2 hours. The dye vat took on a murky coffee color, or deep roasted bone beef stock. This is the silk right after I turned it. It has been in 5 minutes.

In the meantime, I boiled five yards of silk with an alum mordant solution. I am told this will be more mahogany. Dying looks much easier on the page that it is in reality. I love this part of the research because I find so many things are NOT things you can simply follow the instructions on and have it come out perfect each time. I am turning the cloth every fifteen minutes as it boils away in the vat. It is actually at a very slow simmer and I keep a polyester net bag full of hulls in there to deepen the color.

In the meantime, it is lampwork, stewing the dried and recently fermented cochineal to see if it can do red or once fermented always mulberry, cutting out the plain silk kirtle and sewing up the pink kirtle. I have learned my french seams and I believe good material helps you learn. Silk needs the added seams. It prevents it from raveling. Now, the neckline is a problem I am not quite sure what to do. The various instructions seem at odds and it is hard to french. So, I do it my way. Go me. This is the kirtle or under dress.

Oh! It has been an hour.
How about a picture on our progress with that dye vat? It is darker, but not nearly as much as I wanted. I am disappointed. Why isn't it super brown?? This is silk! It should be dying a very dark color. It isn't bad though, is it? This is probably the final color and it isn't awful by any means.

I will go back to pinning the pink kirtle.

Bumpy beads


This is my first try at raised bumps. I still have control issues and need practice, but my cousin Jeffy has gladly taken all my old beads off my hands. I am doing custom beads for her for Christmas. It is a fun idea because she can motivate me to do what suits her, which is also a direction for me to practice.

The evil eye project is basically done. I am going to do a couple of bracelets so I will be making more evil eye beads, but not right now. I really need to learn and perfect dot techniques of all sorts and raised bumps are a big deal.

I am also on the search for nice wool and lining for my new clothing. The kirtles are coming along nicely and I should have pictures up later. I am going to french the seams, but only because it is good when working with silk.

Sunday, November 05, 2006

Pink Tunic


Eh.. well this is another thing that will end up in Gold Key. The good thing? I used a bunch of scraps except for the trim. The black is a washed silk twill bordered with a black braid. The tunic is sportswear so it will be perfect to loan, when I get to that point. It will be sturdy and wash well in cold water.

It is nice and uniform. The washed silk came from a skirt that I tore the gusset on a few years ago. I stashed it to use for trim. I did the same with a pair of dark jade green pants. I plan on using them later but with a linen dress I have in mind. It kept me out of trouble!

On another note, I gave all my old lampwork beads to my cousin Jennifer. She has ideas and I am going to make the beads and give them to her. Then, she can order what she wants. She wants green, blue and red cubes. They will be very small. She also wants some beads with texture. It was nice because everything she wanted was period.

Wednesday, November 01, 2006

Dying!


I have been going a little nuts because the dye vat of indigo is stalled out. I need to put the whole mess in a metal container and warm it for a while. I don't want to because it is going to smell awful. I did get a huge container of soda ash from the pool supply place. I cannot say it was cheaper, but I think it may be.

Instead of indigo, today is cochineal. I am working on the colors and seeing what will come of what I am doing. I started with an old sideless made of unknown material. I decided to use this as my test while I wait for one cotton broadcloth to dye and some silk to mordant. Alum is the mordant and I am doing an amonia rinse on the unknown fabric. I mean seriously, no big deal if this doesn't look great.

I started with my dye pot which was 4 ounces of ground bugs that were fermented for about 2 weeks. I intended to dye things within a day but my schedule got busy and I needed the big pot for other things. I plunked my disgusting blend of bugs into a strainer and kept all their nasty little bodies for more dying later.

I can see they will have more life in them. The instructions for cochineal often mention they can be reused. They just have to be dried throughly and bagged. They will not be as strong, but as you can see here, they have plent of life left in them. Or dye that is, since they are especially dead after having been pried from their host prickly pear, dried, ground, boiled, fermented and drained.

One of my problems is this is a late period dye that I will be using on early period clothing. I am not too concerned as that only will be of concern to very informed folks. I am going to be embroidering on scraps of this dye lot for other dresses and probably will put a bit of wool embrodiery on the under dress I am doing for this particular piece.

I am also using rubber gloves to handle the material. This stuff is really chapping and drying out my hands. I think it is the alum. I am also handling very hot material as I am treating it twice. The fabric is simmered in the alum mordant and then I am swapping it right into the vat of cochineal.

Here is the fabric in the vat.

Notice the deep, rose color? This is after about 10 minutes in the cochineal solution. It is developing and interesting color that I am very fond of, so I couldn't be more pleased.

This particular piece is two different fabrics. They both appear to be a cotton/polyester blend. I am not sure how well it will take the dye, but that is what experiments are about. The colors really changed by the time I took them out of the vat. You can see the difference in the colors of the two fabrics.


Then I put it through an amonia rinse. This is to set and alter the final color. I did this in the washing machine and now it is showing every little mistake in my dying. You really have to get in there and turn everything and rotate the fabric for even coverage. The end result wasn't quite as pretty as what I pulled out of the dye vat. You can see the mistakes and it isn't nearly as dark.

It isn't horrible though and it has far more character. The distinction between the fabrics is blatant though. I will take pictures of it on me after I find something to put on the sides.

Thursday, October 26, 2006

Evil Eyes!


I found cute documentation on these. Ward off the evil eye. I sat down with my torch and made 12 the first night. I am going to make more to give to my feast helpers as a thank you. They ranged as trade items between India and Denmark it seems. They were very popular in Turkey and still are. Plus, this is a great way for me to learn my rudiments.

Monday, October 23, 2006

Stuff that I did today....

the r
h

This is the new Baronial favor. The top is a tassle that Magge Nettlewood and Margaret Woodbury came up with for the feast that I autocrated. Tassles for camels. I thought they were festive, and wow.... That was insane. The two of them did it by themselves. I thought they were so spiffy. I never would have come up with something that good.

I come up with site tolkens that involve a draft and war rations. Unsuspecting Wolfscairners! I had half their barony drafted before they started yelling, "Hey!" Garth gleefully said we needed a war to fix it.

The two coins on the left are the coins Princess Oonagh and Prince Helgi the Dread gave us. That was nicer than being beaned in the head with a pillow.
The grape vine is from their Excellencies for being feast autocrat. Everyone seemed happy. That felt great.


This is the dress I made today. I think it is the last working normans I can ever do. I will take more care and do my next rig right. Even dig out that jar of bugs and dye some fabric.


Thursday, October 19, 2006

Camel in Red Soup

The Redacted Recipe:

22 lbs of camel, cubed to 1 inch with the glands removed
1 pound of white butter*
9 onions, chopped
10 large carrots, in chunks
3 cups of honey
water or camel stock (I thought I would have bone in, so I would have roast the bones and then made stock from them. Instead we got boneless. )
1 teaspoon tragacanth gum or 1/2 cup of gluttonous flour
1 quart of yoghurt
2 teaspoons of kosher or tibetan salt
1/2 long pepper

Be very careful with the camel meat. I rinsed it twice and bled it off a bit. I rinsed and patted them dry twice. Then I cut up the meat. I think we had leg meat as the parts I thought I knew corresponded with the gland location on sheep or pigs. I saw one right away, so I was ultra careful about removing the glands. If you buy meat from a good butcher, they will do this to the large meat slabs. I started looking for them and removed all glands as I was cutting the meat in 1 inch cubes.

We then browned the meat in the butter. We used unsalted churned butter because that much
white butter would add about $16 in cost to the meal. We browned it in small batches in cast iron pans and the pot in order to get carmelization to take affect. The scent was pleasant at first but I found it got to smelling 'charred' right away. I think it is the sugar in the meat.

We then threw the onions in the extra fat from the browning of the meat until they were nice and translucent. We put those in the stock pot with the camel and added our carrots. Then we added the honey and enough water to cover it. We deglazed the browning pan with water and put that in the soup. We let that simmer for about 4 hours and then chilled it over night for the feast.

The next day we put the pot on simmer for the day. When it came time to prepare for the last course, I stirred the powder into the yoghurt. I then added as I was told, by gently heating the yoghurt in the ladle, then spooning in broth, then incorporating the yoghurt in little increments. Serve with more white butter on top and over or with steamed millet with onions.

*White butter is the fat off of whole, unhomogenized milk that is left to hang for about 2 hours. It cannot be substituted with salted butter, cream, half and half or oil. It can be substituted with unsalted butter, mutton or camel fat.

Tuesday, October 17, 2006

Recipes...

Katira asked for some recipes

Pigeon or Chicken Pie

2 lbs ground chicken (dark meat is better)
3 teaspoons thyme
3 tablespoons parsley, fresh
1 tablespoon white pepper
1 tablespoon fenugeek leaves, crushed
1 juniper berries, mashed
3 cups almonds (ground)
1 cups pinenuts, toasted and ground
2 lemons, juice of
1 teaspoon salt
12 teaspoon cinnamon
1 cup pomegranate mollasses
8 tablespoons unsalted butter, melted
3 large onions, ground
1 large carrot, ground
1/4 cup of rose water
3 cloves of garlic, groud
1/3 cups honey
1/3 cups water
9 leaves phyllo or mountain bread

Grind together the chicken, onion, garlic, carrot and the juniper berry. Melt the butter in one pot and melt the honey and water in another. Brush a tin with butter and lay in the mountain bread of phyllo. Brush that with butter. Repeat three times. Mix all the remaining ingredients and pack on top of the phyllo. Cover with three more buttered layers of phyllo and then one layer of phyllo that is brushed with honey water and bake for 25 minutes at 320 degrees.


Chelow:

3 cups basmati rice
9 cups water
2 tablespoons salt
1/2 teaspoon tumeric powder
1 teaspoon saffron threads
2/3 cup butter, clarified melted, unsalted or olive oil (see note)
1/2 cup of white butter (this is made only from the fat from the top of whole milk)

Wash the rice 4-6 times until it runs clear. Pick it over as needed. Boil the rice between 6 and 10 minutes at a full rolling, boil. Drain the rice. Steep the safforn in a tablespoon of boiling water. Whisk 1/4 cup of white butter, clarified butter and enough water to thin it (I am thinking 1/2 cup of water from the modern recipes.) Pour the butter mixture into the pot. Pat half the rice into the pot so it makes a shell, then mound the rest in the middle. Cover and cook it covered 8 minutes. Then turn it off. Sprinkle the rice with 1/2 cup of water. Get a dishtowel and wrap the lid of the pot, or put paper towels between the pot and the lid. Cook on low for 40 minutes or until golden crust forms. Now, our cooks decided to parboil this for 24 minutes instead of 6-10 so it got mushy and puddinglike. We only allowed 12 minutes for the crust.

Sunday, October 08, 2006

All Hallows Feast!!!

Here we go! This is the first dish I made from the feast. The interpretation is simple. I believe the mention (with no recipe) is from Perry. Enough folks are putting the information where I can get it and the artist formerly known as Anahita has been a huge help. Anyhow...

The dish is described as almonds and nuts boiled in honey. Remember those pigeon towers? This type of dish is a halwa or sweet from there. It is cute. There is not really a word for dessert. Halwa is a term of endearment for a girl or a sweet. There are many different types. A carrot and raisin pudding is one of the best known. They also did it with grains or shredded roots we normally would treat like vegetables. Ah, more medieval genius. I looked at both modern and old recipes and called or harrassed everyone I know. Poor Sam.

I decided to boil the honey to almost the hard crack stage.

It has to do with the sweets from the area I was studying. High sesame seed production and almonds, and known for a sweet a bit like medieval nut brickle. This is one of the few dishes in the feast that

I boiled honey, milled sugar (yes, they had it), saffron, rose water, oil, a dash of kosher salt until it was nearly hard crack, then I pulled it off the stove and added the nuts and sesame seeds. Then I dropped it onto cookie sheets in about teaspoon sized lumps. It tastes wonderful and came out so pretty, that I wanted to show you.

Friday, September 15, 2006

The Pigeon Towers of Isfahan.


The pigeon towers of Iran will play a significant role in the feast I am doing.

From the url: http://archnet.org/library/sites/one-site.tcl?site_id=8372

Notes Hundreds of pigeon towers or dovecotes, dating largely to the Safavid reign, dot the fields in the vicinity of Isfahan. Distinct examples of secular architecture in Iran, these structures played an important role, much alike the subterranean canal system (qanats), in sustaining the hinterland that made possible an urban center at Isfahan. The turrets built with the purpose of collecting pigeon dung were a significant source of local revenue and were frequently decorated with white plaster and crenellations.

These cylindrical towers constructed of brick, gypsum, and lime plaster would range from 15 to 25 meters in diameter to often imposing heights of 20 meters or more. Topped with domes with crevices to allow access to honeycombed interiors, each pigeon tower could accommodate thousands of the Persian wild pigeon that could be harvested annually for dung to manure fields and soften leather in Isfahan's famed tanneries. Agriculture in the fertile but nitrogen lacking Isfahan plains was largely supported in this manner, and the legendary melons grown in the region were particularly dependent on this fertilizer. These structures have been deteriorating with little maintenance ever since they were rendered functionally obsolete with modern use of chemical fertilizers and tanning chemicals. There has been a significant drop in pigeon tower numbers from the thousands reported in seventeenth century accounts of Safavid Isfahan by French traveler Chardin, to the present day count of approximately a remaining hundred in the entire province.

Sources:

Hutt, Anthony and Leonard Harrow. 1978. Islam Architecture: Iran I. London: Scorpion Publishers, 171.

"Dovecotes, Esfahan". IranGardan Publication Website. http://www.irancaravan.com/Ih99.htm#Dovecotes. [Accessed February 13, 2006].

"Pigeon Towers". Isfahan Website at the Anglia Polytechnic University. http://www.isfahan.org.uk/kabutar/kabutar.html. [Accessed February 13, 2006].


Someone is saying there were as many as 3,000 of these pigeon towers outside of Isfahan during period. Even if it were only 300, it would provide an incredible amount of fertilizer. The towers were cleaned 1 time a year which is pretty common for a poultry cleaning. Archeologists seem to miss something about this. Modern poultry production safety requires that you were a full respirator when cleaning a cote or coop. Bird and bat feces tends to go airborn fast and the fecal dust has some pretty shitty things in it. The guy who cleans the coat had better be paid well because I know the hard way, that even with a respirator, you will be sick for a week after you do it. I would love to know their cote-cleaning fatality rates. Another variable to consider... I get sick far less often than my contemporaries because in part, I have an intimate relationship with organic life.

http://www.muslimheritage.com/topics/default.cfm?ArticleID=368

I need the book of agriculture. Must sleep. Post later.


Monday, September 04, 2006

Weather

Someone suggested I call the class "Waste Product Sciences".

The problem with "Waste Product Sciences" is that it wasn't waste. It was another product. It sort of conveys that all this stuff is waste and it really isn't. It is particularly interesting to run economic reverse projections on the amount of manure produced prior to the plague years in Europe. The weather pattern was significantly differnt in 1348.

People had to eat breeding stock to make up for their lack of calories in the normal harvest. It is really hitting home this year. We had a very odd year in California. I am a farmer by profession. My early bloom crops like almonds, cherries, oranges, early peaches, plums, apricots, apples and nectarines took a huge hit this year because the rain fell when they were blooming. This knocks the flowers off the trees and keeps insects from polinating the blossoms. Notice that it wasn't a frost, but rain at the wrong time of year that was the problem. Now in the 1340s we see a significant climatic cycle that basically compromises about 3-4 years of stored food. This year, I had one tree that produced peaches, 2 prune trees (prunus vulgaris "French" the imperial didn't go) , about 1/3 my normal apple crop, no pears, no cherries, no almonds, no oranges, good lemons, no other plums, no apricots and the grapes (cabernet) look good.

I am considering writing a first person naritive of what it would be like to have to live on this little. I would be slaughtering breeding animals in September.


BEST SITE OF THE WEEK::

http://digital.library.ucla.edu/immi/

Thursday, August 31, 2006

Ink Research

Links to internet research:

I found this advertisement from 2003, and I would like to look into human urine and bamboo.

a village lost in the wilderness of the huge Tibetan plateau, nestled between cliffs and whipped all winter long by an icy wind, which hides a unique rare pearl: its printing house." Here the Tibetans print their sacred manuscripts, using traditional hand methods to carve the wood blocks, make the ink, and make the paper. In Chengdu the group visits the memorial to Hsieh-Tao, whom the Chinese describe as the first lady papermaker. During the great Tang Dynasty (8th cent.) she created fancy designs in notepapers (this was the beginning of watermarks in paper),on which she wrote love poems. For another amazing papermaking experience, we drive to Fuyang, the largest center of papermaking in China for both handmade paper and machine paper. Here we visit a village inhabited by Cai Lun's descendants,who make bamboo paper by hand. And we see the unusual method of using human urine in the processing of bamboo. In Anhui Province we see papermakers producing the famous "Xuan" paper, revered by Chinese painters and calligraphers. They believe the handmade paper of Anhui surpasses all others. For details, contact Elaine Koretsky at the Carriage House Paper Museum, 8 Evans Rd. Brookline MA 02445, USA; tel: 1(617)232-1636; email: click here
http://www.paperhistory.org/arch_nws.htm

_______________

This is from an article on soil conditioning in the Ganges but I think I can use the information on an economic projection. It should tie in well with the theory on plague being worsened by weather and manure shortage issues. I have outputs for cattle and pigeons.

The daily per capita availability of night soil, human urine and nutrients contained in it is as under:

Particulars

Faeces (g)

Urine(s)

Quantity (natural condition)

133.00

1200.00

Quantity (dry)

30.30

64.00

Nitrogen

2.10

12.10

Phosphorus

1.64

1.80

Potassium

0.73

2.22

This data shows that night soil and human urine have a great manurial potential with regard to nitrogen, phosphorus and potassium. Due to this potential, it is considered good manure by the farmers.

http://www.fao.org/docrep/x5672e/x5672e03.htm

_________________________

Nevertheless, Egyptian toothpaste was more pleasant than that used by the ancient Romans. Roman toothpaste around 100 A.D. was made from human urine. Between brushings, urine was also used as a mouthwash. Roman physicians claimed that brushing with urine whitened teeth and fixed them more solidly in their sockets. Indeed, some urines were more highly prized than others. For example, Roman aristocrats paid dearly for urine imported from Portugal. Portuguese urine was reputedly both the strongest smelling and the best whitener.

Urine remained a common ingredient in toothpastes well into the 18th century. This was because early dentists knew that urine is a ready source of ammonia - one of the most effective natural cleaning and disinfecting agents. Even today, ammonia can often be found in modern dental pastes.


http://www.harpercollins.com.au/drstephenjuan/0507news.htm
______________________

HA!! Papermaking!!

nique Bamboo Paper

Donated by Elaine Koretsky
Shipping Weight: two pounds
Estimated Value: $100
Starting Bid: $35

Ten full-size sheets (12.5"x15.5") of paper featured in the Winter 2005 issue of Hand Papermaking. Produced in Cai Jia Wu, China, the bamboo for this paper is harvested, soaked, and cooked in the usual way, but the final stage of processing is unusual. The fiber is further softened in a pit containing five parts water and one part human urine. This paper is dyed yellow to simulate gold and used primarily for burning at religious ceremonies.

http://www.handpapermaking.org/auction/item05.htm

_____________________________

OHMIGAWD!!! I NEEDED A KID'S URINE!!!

Brown inks : Bistre
Old Master drawings are popularly identified with the handsome brown color of their ink. Formerly these sheets were commonly described with the misnomer "sepia". It is usual today to describe all such drawings as "pen and brown ink" or "brush and brown wash", because, although a number of different inks were used, it is difficult to distinguish between them. Of the two primary kinds of ink, bistre presents more or less the original appearance at the time of use, and iron-gall ink turns from black to brown with time.

Bistre was made from chimney soot dissolved in wine, water, or a child's urine. A binder was not necessary. The color of bistre varies with the wood from which the soot was derived, but in general it has a warm, transparent brown tone.


http://www.nyu.edu/classes/miller/guide/bistre.html

____________________

Again, urine is not the first choice...

XX. For the vermilion.

Vermilion becomes very fine in aquavitae, or in child's urine. But it will be still finer, if you put in aquavitae with a little saffron. It is used with whipped whites of eggs.


http://old-crafts.com/colors_and_painting/compositions_for_limners.htm

Wednesday, August 30, 2006

And Ink!


Today, I continued with my learning about cheese. Luckily, the baroness is teaching me via email and phone. Between my car and her bum foot, we are both stuck at home. It isn't so bad. I am learning a lot. The haloumi and teleme are pressing in the refridgerator and I am boiling down the mysost as we speak.

It has to reduce by 75% before the next step. That is taking a lot longer than I expected because of the electric stove. I will probably be editing this post as I go. I am excited about this because it is a whey based cheese instead of a milk based cheese.


Well, you knew it was coming Susan. Yes! Time to make ink! I found an old iron pipe that was not galvanized and set about soaking it in some old urine. The recipe prefers first morning urine, but I actually am running low on that and saving it for other projects. It should be done in a stoneware jar, but I do not have those either.

I decided to cruise around the internet and find out where I got this recipe. It was at the time when all of my search came from the internet. I remember it because when I was at Penssic a few years back, I asked a merchant about it. He pulled out a manuscript that had been eatten away by the ink. He thought the one he had was an iron gall ink. Anyhow, he said urine-based would do the same thing only faster.


On another note, Magge and Graywolfe gave me Caroline Holmes The Not So Little Book of Dung which was just released. It has interesting pictures and I will review it after I read it.

__________________________________

Ok, so on to the collection of internet notes... (For those of you who are new, I paste notes in here and links so I can look them up later.) Every time I look for notes on why I am doing something, I find a gazillion more links that show how little I know.

__________________________________
Red ochre, the most common red pigment, was rarely used in manuscripts, but commonly used in wall painting. Vermillion was obtained from cinnabar, or through a chemical reaction of heating mercury and sulfur together to produce mercuric sulphide. Mixed with white lead it formed a flesh color, olchus or membrana. Red lead, minium or sandaraca, was prepared by heating white lead for several days. It was necessary to stir the pot every two hours, and it was suggested that one forego sleep for several days. It was recommended that vermillion be added to the lead to make it more brilliant. Brazil wood dye was the most useful red pigment for manuscripts. Wood shavings were soaked in a solution of lye, wine, or urine for several hours and then alum was added. The intensity of the color was a result of the quantity of alum added. Pigment was mixed with glair for red ink or for glazing over illumination. It could be precipitated into a powder and then mixed with gum to be made into paint. Purple was derived from a mixture of azurite and brazil wood, or the juice of bilberries and alum. A common purple pigment was folium, derived from the seeds of turnsole. It was used in the form of clothlets, and cheese glue was used as a medium. White was obtained by the use of white lead even though it was poisonous and turned black in the presence of certain other pigments. It was made by placing plates or strips of lead above vinegar. The white lead was scraped off, and wine was used as a medium. It could not be mixed with vermillion or orpiment, and so in those instances other white pigments such as ground bones or egg shells were used. Orpiment (an arsenic compound) was widely used for yellow, even though it was poisonous and rather coarse. Because it was so coarse it was customary to add another pigment, yellow ochre, to it which would give the painted surface a smoother appearance. Yellow ochre was rarely used by itself in manuscripts, as it was more appropriate for wall painting. Saffron was also used to produce a yellow pigment, though it was not permanent.
http://web.ku.edu/~bookhist/medbook1.html


Oh and lookie!!! Persians! I need to bring this up with Master Jim. I don't think I can get mango leaves so I will see if the substance is available in India. This is also a serious published study and a must have for the collection. Journal of American Institute for Conservation 1991, Volume 30, Number 2, Article 2 (pp. 125 to 144)

Organic yellow pigments were not found in this analysis, but they may have been used. Indian yellow, a brilliant, stable, yellow pigment prepared in Bengal from the urine of cows fed on mango leaves, may have been used by Persian painters. Saffron, a rich golden yellow powder from the flower of the plant, Crocus sativa, that was cultivated from Sassanian times in Iran, probably could have served directly as a pigment (Laufer 1919, 320). The Persian painters may have found this powder particularly useful in combination with gold pigment. Because saffron has always been dear, less expensive colors such as the orange from safflower (Carthamus tinctorius) or the yellow from shoots and roots of tumeric (Curcuma domestica and Curcuma longa) were often combined with saffron as adulterants (Laufer 1919, 309–10; Wulff 1966, 191). Wulff (1961) has indicated that both colors were employed in Persian textile production as well. Iranian textile dyers employed yet another yellow prepared from Persian berries (Rhamnus infectorius) as a lake; it might have been used as a pigment, too.
http://aic.stanford.edu/jaic/articles/jaic30-02-002.html

Wednesday, August 23, 2006

A&S strikes Vinhold


Luckily, no one reads this blog....

So, we have our troops somewhere. Our baroness says we need a banner for that so we made her one. There are several pictures of it. I have done a few silk painting pieces but this is the first one that I felt a part of. I hope you all enjoy it.

Saturday, August 19, 2006

Did you think I was done?

HA! No. This is my primary way of showing Susan what I am doing, so she gets to see loads o projects. I am making good on my intention to learn illumination and calligraphy. It has been years since I picked up a pen and this time I decided to work with a dip pen. Might as well learn it the right way.

You will notice that the fonts are different and the penstroke is completely off in my first attempt in about say... years? The black pen is my great grandfather's dip pen that I found in his desk. I was using stamp ink on a flat surface. It is a ball tip, so it doesn't pick up the look that I want. The purple is a shaefer with a cartridge.


Ah ha! Here we go! I ran to Michael's and got a Chronicle dip pen with five round hand tips to learn uncial. I don't know that one at all. I guess that is obvious from my practice pages.

Master JimBear was so sweet. I called him and he was kind about walking me through what I needed and curbing my shopping habit. I can't be trusted in that mode and I think he knew it. I wanted to buy everything I needed for my project day so that there were no holes between blogging and production. I limited myself to a Chronicle dip pen and set of nibs, calligraphy paper and sumi ink. He said no to brushes and such, and will try and pick some up for me in LA.


To my county hours... I think that is what this is!

I started this when we first had some stuff to take home from the calligraphy and illumination workshops. I expanded the 8x10 drawing to fit my water color pad. I taped it in the window and did some tracing. The first time I colorded in the bits, I didn't really understand acanthus leaves.

I am repainting all of the acanthus so that I understand the twist and thrust of the leaves. Undersides are red and overs are green. It is sloppy, but remember, this is my first time ever using a water color since like second grade.

The piece has ink spots from my calligraphy, and I think I will figure out something cute to write on it and hand it off to someone as a letter of appreciation.


After


Before

This is the urine vat after 2 hours in the sun and an infusion of sugar. As you can see, it is noticably darker than it was when I started. I hope this shows in the pictures. The cloth is turning color and it is taking on a cast of muddy green. I hope the oxidation works. Keep your digits crossed!